Docs
Install 765T Flow for Revit
One MCP address, seven hub tools, and every write is one named undo step. This page has what you need to install Control Center on Windows and connect Claude, Cursor, Antigravity, Codex or Devin.
MCP endpoint
Every AI app points at the same address, over streamable HTTP:
https://765tflow.com/mcpAuthentication is OAuth 2.1 with PKCE in the browser: the first connect opens a 765T Flow page and you click "Authorize" once. No API key or token sits in a configuration file.
Seven hub tools
These are what an AI app sees in tools/list. When it asks you to allow tools, it shows exactly these seven names; the 446 Revit tools the hub serves from the catalog are opened and run through them.
flow_list_instancesflow_read_resultflow_report_issueflow_toolsflow_callflow_findflow_get
Lists the account's connected Revit instances and their open documents, and returns the instanceId every catalog call needs.
Reads the next part of a long answer, exactly as that answer's next pointer names it.
Sends a bug report, feedback or a feature request to the 765T Flow team when you ask for it, and returns a reference id.
Browses the catalog: the tool groups, one group's members, or one tool's exact input schema.
Runs one catalog tool by its exact name, with arguments in the schema the catalog browse step returned.
Finds the right tool or how-to guide for a Revit job described in plain words. Read-only.
Reads one guide or tool entry in full, by the ref the search step returned. Read-only.
The two guide tools are listed when the hosted guide library is available.
How a write runs
The assistant you connected decides: no approval dialog sits in between.
- Preview is optional: for a tool that supports a dry run, the call sets dryRun to check first without touching the model.
- Each write sits in one named undo step in Revit.
- After the write, the tool reports the execution result and the list of elements it changed.
- A write whose outcome is uncertain is never blindly retried.
Install Control Center on Windows
The installer sets up Control Center and the add-in for Revit, and installs for the signed-in Windows account only. The installer includes the Revit 2021 connector alongside Revit 2022, 2023, 2024, 2025, 2026, and 2027. Revit 2024 through 2027 are tested on disposable models in live Revit sessions. Revit 2021, 2022, and 2023 are included in the installer and are not yet tested in a live Revit session.
The connector opens an outbound secure WebSocket (WSS) to 765tflow.com. The same address has HTTPS endpoints for results too large to send over it, and for a fallback that polls at a pace the server sets. Nothing on the workstation accepts connections from outside; the only listener is the sign-in redirect on 127.0.0.1, your own computer, open for one sign-in attempt and then closed.
The version and the installer file name appear here once the release information is available.
Create a free account or sign in with Google or email on 765tflow.com, then click Download for Windows in your account. If your browser blocks the downloaded file: in Chrome, open Downloads and choose Keep; in Edge, hover the download, click the three dots → Keep → Show more → Keep anyway.
Run the installer. When you open the installer, Windows may show a blue “Windows protected your PC” screen. FLOW is new, and its installer is not code-signed yet. Windows shows it for any app it has not seen often yet. Click More info. The screen says Publisher: Unknown publisher. Click Run anyway. The installer then opens as usual. Button names follow your Windows language.
Open Revit. When Revit asks about the 765T Flow add-in, choose Always Load.
Optional, and it clears the block your browser attached to the file: right-click the downloaded .exe → Properties → General tab → tick Unblock → Apply.
No Run anyway button at all? Smart App Control is blocking the installer, and Windows has no way to allow this one app through. Install it on this PC, where Revit runs. You can turn Smart App Control off in Windows Security to install. FLOW's files are not code-signed, so with Smart App Control on, Windows can block FLOW itself, not only the installer. Keep it off while you use FLOW. Windows may ask for an administrator's permission to change it, so if your company manages this PC, ask your IT first.
If you have an older FLOW install, uninstall it first, then run the installer for the latest version.
Read the illustrated install guide
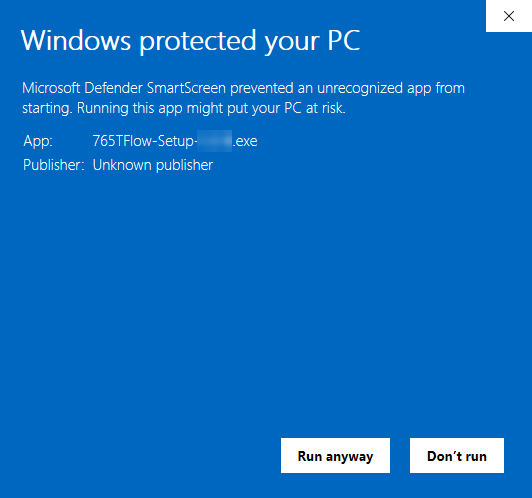
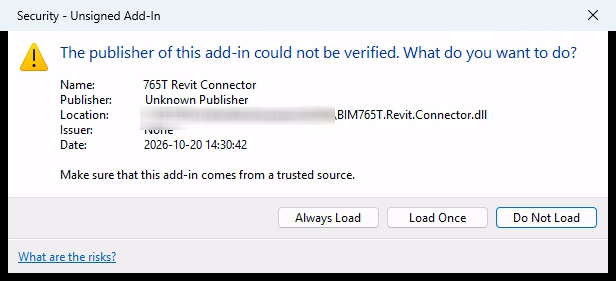
The download page, with the steps for when Windows blocks the installer
Then pair the Revit side with your account:
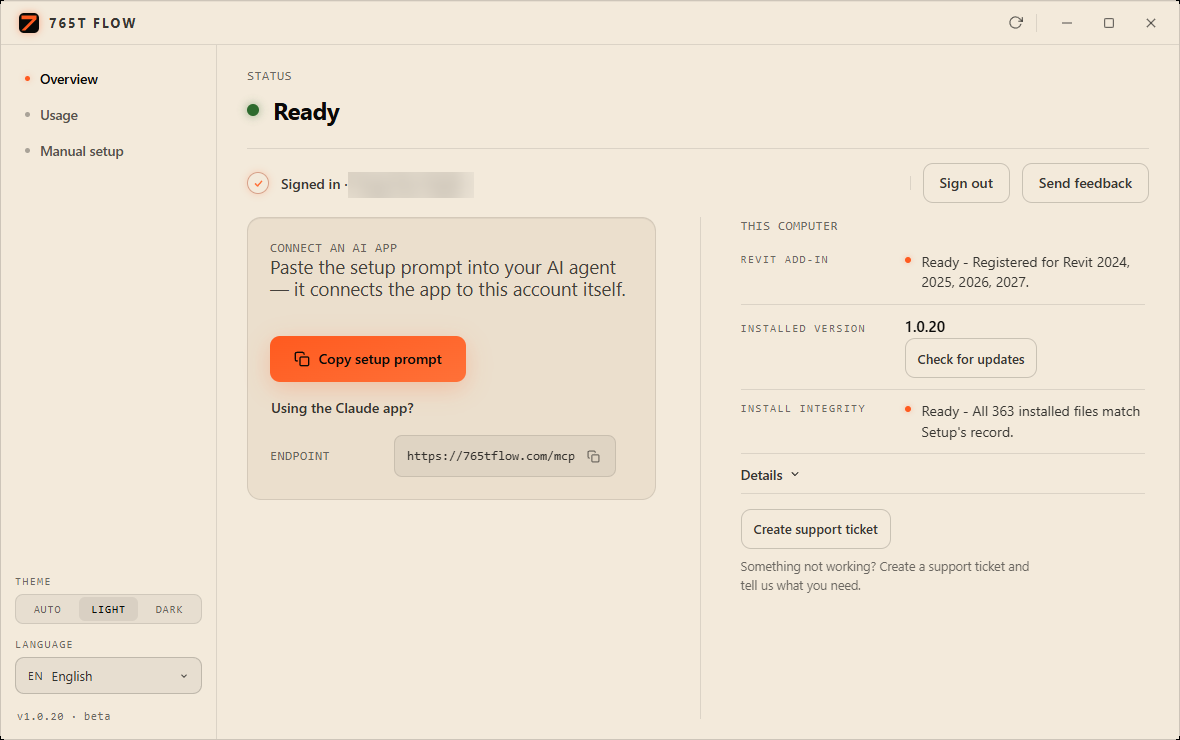
Open 765T Flow Control Center.
Press "Sign in" on the account strip.
The browser opens this very site: click "Authorize" once. The card updates itself when the account is accepted.
Connect Claude, Cursor, Antigravity, Codex or Devin
Each app adds the same MCP address; the first connect opens the browser for your "Authorize" click.
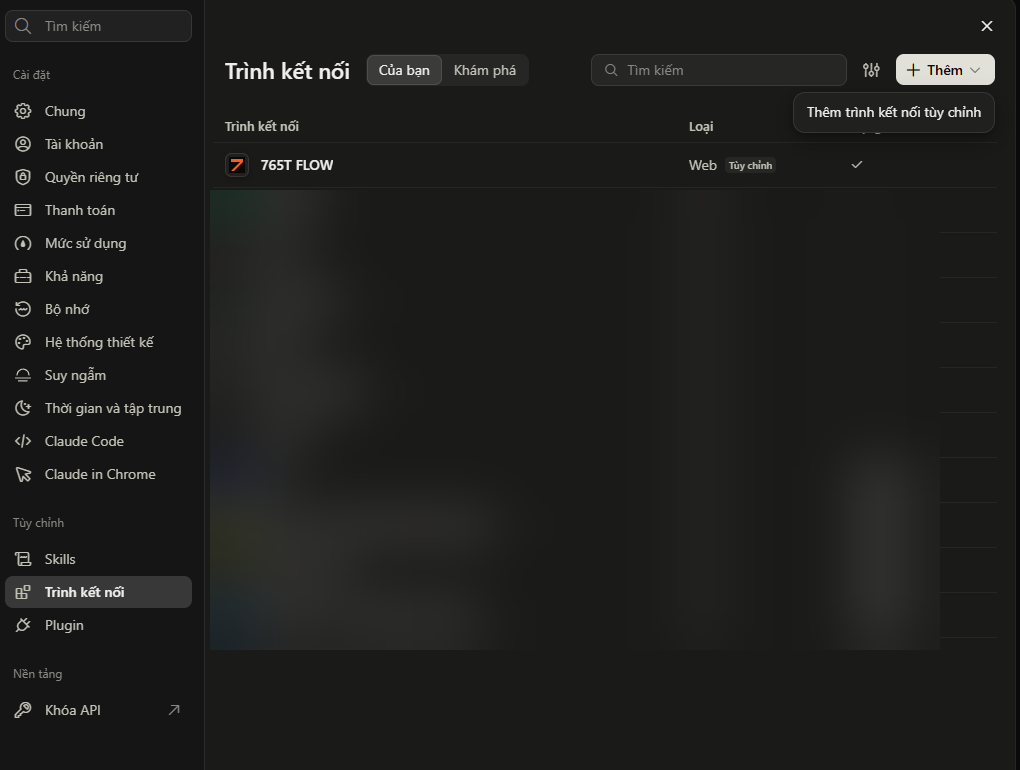
Claude
In Claude (on the web or in the desktop app), open "Customize > Connectors".
Click "+", then "Add custom connector", and paste this address:
https://765tflow.com/mcpClick "Add": the browser asks for "Authorize" once, and that is all it asks.
Cursor
With Cursor installed, click the button below. Cursor asks you to confirm, then adds the 765t-flow server.
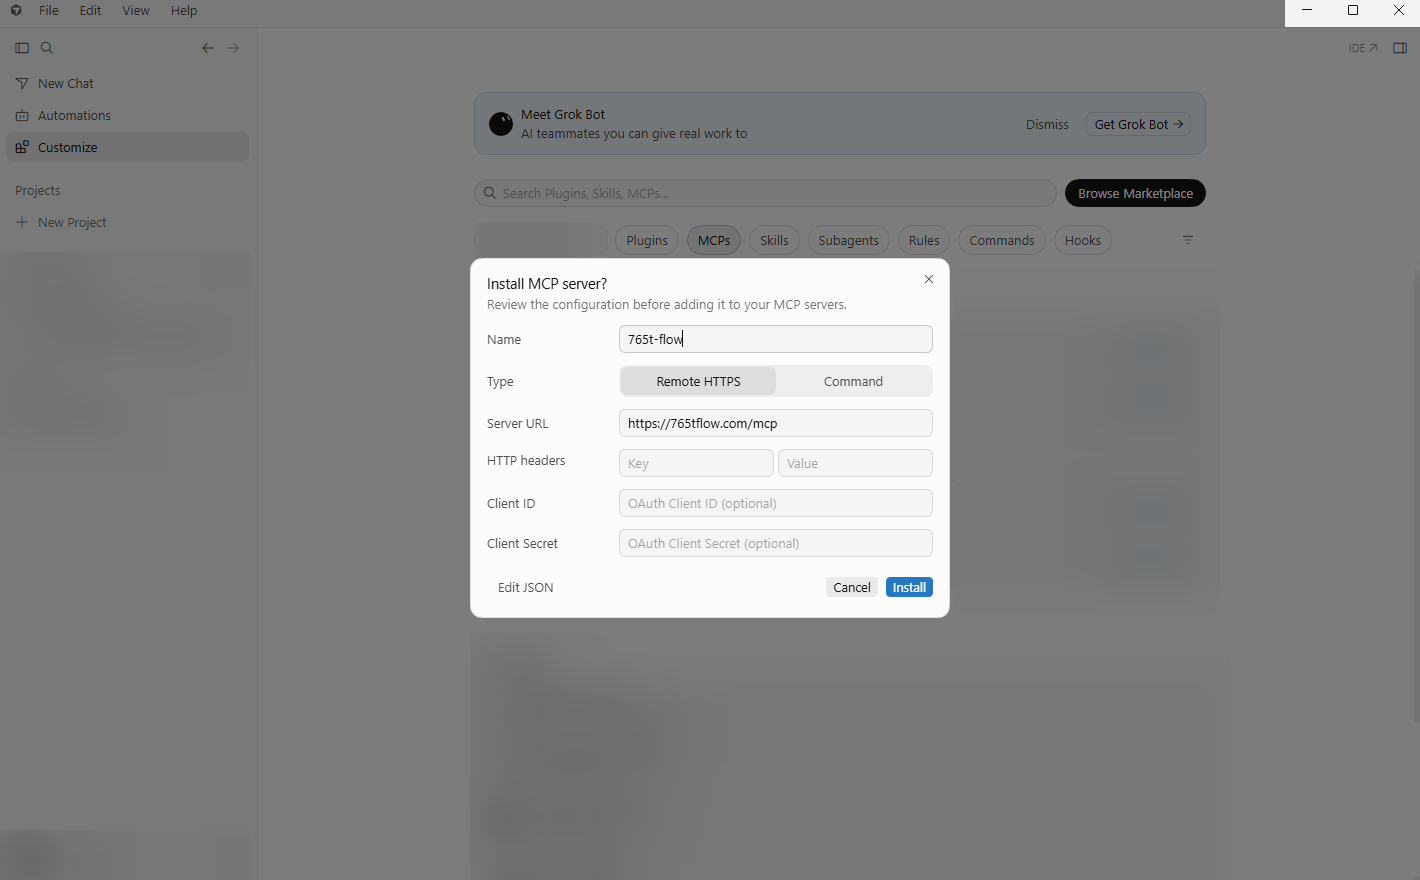
Or add this block to ~/.cursor/mcp.json yourself, then restart Cursor:
{
  "mcpServers": {
    "765t-flow": {
      "url": "https://765tflow.com/mcp"
    }
  }
}Antigravity
Antigravity reads remote MCP servers from the serverUrl field in its raw MCP configuration (mcp_config.json):
Open mcp_config.json from the Antigravity IDE Agent side panel (… menu → MCP Servers → Manage MCP Servers → View raw config) or edit ~/.gemini/config/mcp_config.json directly.
Add the 765t-flow server entry under mcpServers and save the file:
{ "mcpServers": { "765t-flow": { "serverUrl": "https://765tflow.com/mcp" } } }Open Agent settings (Ctrl+, on Windows) → the Customizations tab, click Authenticate next to 765t-flow, and click "Authorize" in the browser.
After you click "Authorize", the browser lands on Antigravity's callback page (antigravity.google/oauth-callback) and shows a one-time OAuth authorization code. Copy that authorization code, paste it back into the Antigravity settings panel, and click Submit so the app on your PC receives the code from the browser and finishes connecting 765t-flow.
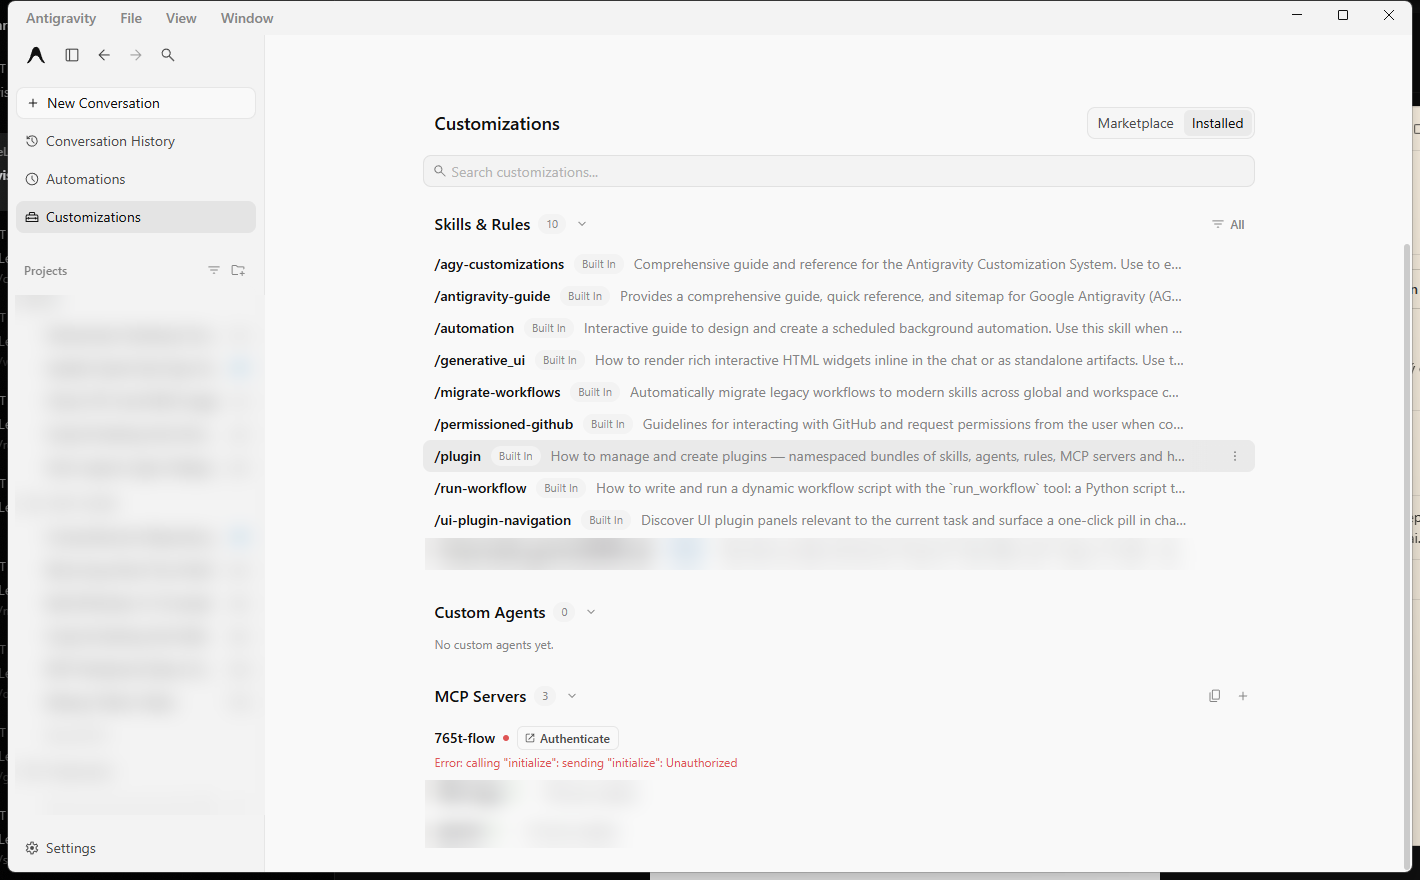
Codex
Codex stores a remote MCP server in ~/.codex/config.toml, under [mcp_servers.765t-flow]. Add this block:
[mcp_servers.765t-flow]
url = "https://765tflow.com/mcp"Then run codex mcp login 765t-flow. The Codex CLI and the Codex IDE extension read this same file.
Devin
On the Devin CLI, add the remote server for your Windows user:
devin mcp add -s user 765t-flow https://765tflow.com/mcpThat command writes the user file %APPDATA%\devin\mcp_config.json. The url field is the one the CLI documents for a remote server:
{
  "mcpServers": {
    "765t-flow": {
      "url": "https://765tflow.com/mcp"
    }
  }
}Then run devin mcp login 765t-flow.
Other apps with remote MCP over streamable HTTP and OAuth use this same address. 765T Flow writes nothing to any app's configuration on its own, and the Add to Cursor button adds the entry only when you confirm in Cursor.
Check the connection
Ask the assistant to list your connected Revit instances. The answer lists them; an empty list means no add-in is online yet: open Control Center, press "Sign in" and start Revit.
Check which Revit model I currently have open through 765T FLOW.Open a Revit model and try your first prompts
Open Revit on your Windows PC and open any .rvt model (or a Revit sample project). Keep Revit and that .rvt model open while you chat with the assistant: every read and write runs directly against your live open Revit session.
Read-only check — List model warnings by type
List the warning types in the current model along with the count for each type.Read-only (0 model changes): the assistant opens the catalog's warning tools and groups the warnings in your open model.
Read sheets and batch-rename with a preview table first
List all sheets in the model with their Sheet Number and Sheet Name. Then show a preview table renaming the first 4 sheets (do not apply yet), and wait for my confirmation before renaming them in one batch.Reads the sheet list first, previews the rename with a dry run (0 model changes), and once you confirm, runs it for real: the entire batch rename sits in one named undo step in Revit.